Growing & Seeds · Growing
Microgreen Trays With Holes vs. Without Holes: Which Setup Works Best?
For many home growers using loose growing media, the simplest setup is a tray with drainage holes nested inside a solid tray without holes.
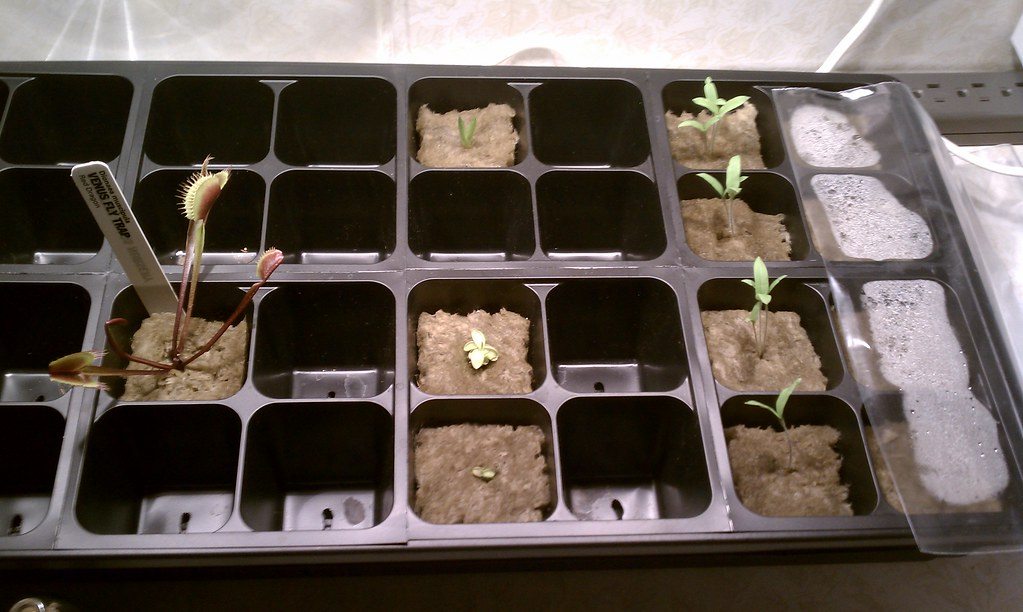
The upper tray with holes holds the growing medium and seeds. The solid tray underneath catches drainage and can temporarily hold water for bottom watering. This setup helps manage moisture while containing runoff on indoor shelves, counters, or growing racks. Penn State Extension and University of Maryland Extension
You can grow microgreens in a tray without holes, but it requires closer watering control because excess water has no route to drain away.
Quick Comparison: Holed vs. No-Hole Microgreen Trays
| Feature | Tray With Holes | Tray Without Holes |
|---|---|---|
| Typical role | Upper planting tray for loose-media growing | Lower reservoir, drip tray, or optional germination cover |
| Can hold growing medium? | Yes | Yes, but moisture needs closer monitoring |
| Lets excess water drain | Yes | No |
| Role in bottom watering | Holds the planted medium above the water | Holds water below the planted tray |
| Catches runoff | No; it needs a tray below it indoors | Yes |
| Can be used as a germination cover | Sometimes, depending on the method | Can be used as a cover in some workflows |
| Main advantage | Supports drainage and bottom watering | Contains water and runoff |
| Main caution | Needs a compatible lower tray for indoor use | Do not allow the medium to remain saturated |
Important context: This comparison applies mainly to tray-grown microgreens in loose media, such as coconut coir or seed-starting mix. Growing mats and other systems can use different watering methods.
What Microgreen Trays With Holes Are For
Drainage for loose growing media
A tray with drainage holes is typically used as the upper planting tray when microgreens are grown in loose media. The holes allow excess irrigation water to leave the growing medium rather than collecting at the bottom of the planting tray.
Drainage does not make overwatering impossible. Watering volume, frequency, room conditions, and the growing medium still matter. But a perforated tray provides a path for excess water to move into a separate catch tray below.
Penn State Extension recommends containers with drainage holes for microgreens, noting that this arrangement allows excess water to drain and supports bottom watering without directly wetting the greens. Penn State Extension
The upper tray in a bottom-watering setup
In a bottom-watering system, the planted tray with holes sits inside or above a solid tray without holes. Water is added to the lower tray, and the growing medium absorbs moisture through the holes in the upper tray.
The University of Maryland Extension describes this type of arrangement as a drainage tray containing medium and seed set inside an undrained tray that acts as a water reservoir. University of Maryland Extension
Bottom watering can limit direct irrigation water on the leaf canopy. That can be helpful for moisture management, but it does not by itself prevent mold, damping-off, or other crop problems.
When careful top watering may still be useful
Bottom watering is common, especially after seedlings are established, but it is not the only workable approach. Some growers use gentle top watering during early growth or when the surface of the medium needs moisture.
If top watering, use a gentle method that does not disturb seeds, compact the medium, or damage young seedlings. University of Illinois Extension describes using a spray bottle or delicate water breaker for microgreen watering. University of Illinois Extension
What Microgreen Trays Without Holes Are For
A bottom-watering reservoir and runoff catcher
A solid tray without holes has two practical jobs in a nested system:
- It catches drainage from the planted tray.
- It temporarily holds water for bottom watering.
This makes solid trays especially useful indoors, where water running off a planted tray can create a mess or damage shelving and surfaces. Utah State University Extension and Virginia Cooperative Extension both describe bottom-watering methods that use a planted perforated tray with a solid tray underneath. Utah State University Extension Virginia Cooperative Extension
Why the lower tray should not become a permanent water bath
The goal is evenly moist growing medium—not medium that remains continually saturated.
After adding water to the lower tray, allow the growing medium to absorb moisture, then assess whether water remains. Utah State’s example bottom-watering method includes discarding water left in the lower tray after the growing medium has had time to absorb what it needs. The appropriate water amount and timing will vary with the crop, medium, tray size, temperature, and stage of growth. Utah State University Extension
University of Maryland Extension similarly advises keeping growing media moist rather than saturated. University of Maryland Extension
Using a solid tray as a germination cover
A second tray can also serve as a cover during germination in some microgreen workflows. Covering a newly seeded tray may help maintain darkness during an early blackout period, and some methods add gentle weight above the seeds.
This is not required for every crop or method. Whether to use a cover depends on the variety, seed size, growing medium, and your own growing process. Utah State University Extension
The Best Default Setup: One Holed Tray Nested in One Solid Tray
For many loose-media home grows, a tray pair makes watering and cleanup easier:
- The upper tray holds the growing medium and seeds.
- Drainage holes provide an outlet for excess water.
- The lower tray catches runoff.
- The lower tray can temporarily hold water for bottom watering.
- The setup helps contain moisture in an indoor growing area.
Penn State, the University of Maryland, Utah State, and Virginia Cooperative Extension all describe versions of this basic drainage-and-bottom-watering approach. Penn State Extension University of Maryland Extension Utah State University Extension
Basic bottom-watering workflow
- Fill the perforated tray with growing medium and sow the seeds.
- Place the planted tray inside a compatible solid tray.
- Add a measured amount of clean water to the lower tray.
- Let the medium draw up moisture through the drainage holes.
- Check the moisture level rather than relying on a fixed schedule.
- Remove remaining water when appropriate rather than leaving the tray continually saturated.
This is a practical framework, not a fixed recipe. A dense tray in a warm, dry room may use water differently from a lightly seeded tray in a cooler, more humid space.
Check that trays actually nest together
A “1020” tray commonly refers to a greenhouse-flat format around 10 by 20 inches. However, the label does not guarantee that every tray has the same exterior dimensions, interior growing area, depth, rim shape, or nesting design.
Before buying a pair, check the product dimensions and confirm that the specific holed tray is intended to fit inside the solid tray you plan to use. This is practical purchasing guidance, particularly if you want to bottom water or stack trays during germination.
Can You Grow Microgreens in a Tray Without Holes?
Yes, but watering requires more precision
Yes. A solid tray without holes can be used as a planting tray.
The limitation is simple: if too much water is added, it remains in the tray unless you carefully pour it off. With no drainage route, it is easier for loose growing media to stay excessively wet.
For growers using loose media, a solid tray can work, but it requires closer observation and more careful watering than a perforated tray placed inside a lower catch tray.
Why a holed tray is often easier for beginners
A perforated tray does not eliminate overwatering risk, but it provides a drainage path if too much water is applied. That can make moisture management more forgiving for newer growers.
For that reason, a holed planting tray paired with a solid lower tray is often a practical starting point for indoor loose-media growing.
Drainage, Moisture, Airflow, and Mold: What Tray Holes Can—and Cannot—Do
What drainage holes can help with
Drainage holes can help by:
- Giving excess water a route out of the growing medium
- Supporting bottom watering from a lower reservoir tray
- Separating the planted medium from collected runoff
- Limiting direct irrigation water on the greens when bottom watering is used
The growing medium needs to retain enough moisture for roots while still allowing adequate aeration. Research on microgreen substrates supports the importance of balancing water-holding capacity and air capacity in the root zone, though it does not establish a best tray-hole pattern. Peer-reviewed substrate research
What drainage holes cannot guarantee
Drainage holes do not, by themselves:
- Prevent mold
- Eliminate damping-off
- Guarantee healthy roots
- Make microgreens safer to eat
- Ensure a specific yield
- Establish one hole size, hole count, or hole pattern as best
Moisture-related crop problems depend on more than tray design. University guidance emphasizes the importance of avoiding saturated media, maintaining airflow, using clean equipment, and managing the growing environment. University of Maryland Extension Virginia Cooperative Extension
The wider moisture-management system
Tray choice is only one part of a successful microgreen setup. Also pay attention to:
- Clean trays and equipment
- Clean water
- Growing media that are moist rather than saturated
- Adequate airflow
- Appropriate seed density
- Crop type and stage of growth
- Temperature and humidity
Bottom watering can be useful, but it does not replace sanitation, airflow, or careful observation.
How to Choose a Microgreen Tray Pair
Start with your workflow
| If you need to… | A practical starting choice |
|---|---|
| Grow microgreens in loose media indoors | One holed planting tray and one compatible solid tray |
| Bottom water | A nested perforated-and-solid tray pair |
| Catch runoff on a shelf or counter | A solid lower tray |
| Cover seeds during germination | A second tray may be useful, depending on the method |
| Grow directly in a solid tray | Plan for closer moisture monitoring |
Understand the 1020 tray format
A 1020 tray is a common greenhouse-flat format around 10 by 20 inches. Before buying, confirm:
- Interior growing area
- Exterior footprint
- Tray depth
- Rim shape
- Whether the two tray models are designed to nest together
Choose clean containers suitable for edible crops
Because microgreens are eaten, use clean containers suitable for food production. Penn State Extension recommends clean growing materials appropriate for food production, including containers with drainage holes when using a bottom-watering setup. Penn State Extension
Repurposed containers are not automatically unsuitable, but avoid using containers that are heavily worn, difficult to clean, or of unknown intended use.
Match tray depth to your process
Tray depth affects how much growing medium a tray can hold, how high the rim sits above the medium, and how the tray handles during watering and harvest. Shallow containers are commonly used for microgreens, but there is no single tray depth that suits every crop and growing method. University of Maryland Extension
Choose a format that fits your medium, shelf space, watering routine, and harvest method.
Cleaning and Reusing Microgreen Trays
Remove residue after harvest
After harvesting, remove roots, spent growing medium, and visible debris from both trays. Doing this promptly makes the next cleaning step easier.
Wash, then clean and sanitize between crops
Reusable trays should be thoroughly washed between crop cycles. Cleaning removes visible soil and residue; sanitizing or disinfecting is a separate step intended to reduce microorganisms on an already cleaned surface.
Follow the directions on the cleaning or sanitizing product label, including any required dilution, contact time, and rinsing instructions. Illinois Extension emphasizes that reusable pots and trays should be thoroughly cleaned before disinfection. University of Illinois Extension
Virginia Cooperative Extension also identifies sanitation as an important part of managing plant and foodborne pathogen risks in microgreen production. Virginia Cooperative Extension
Dry and inspect before reuse
Allow trays to dry and inspect them before the next crop. Replace trays that are cracked, difficult to clean, or no longer work well in your watering setup.
Tray hygiene depends primarily on residue removal, cleaning, sanitizing, drying, and handling—not simply on whether a tray has holes.
Research & Further Reading
University and Extension Guidance
- Penn State Extension — A Step-By-Step Guide for Growing Microgreens at Home
https://extension.psu.edu/a-step-by-step-guide-for-growing-microgreens-at-home
- University of Maryland Extension — Growing Microgreens and Baby Greens Indoors
https://extension.umd.edu/resource/growing-microgreens-and-baby-greens-indoors
- Utah State University Extension — Grow Your Own Microgreens
https://extension.usu.edu/yardandgarden/research/grow-your-own-microgreens
- Virginia Cooperative Extension / Virginia Tech — Introduction to Microgreen Production in Indoor Vertical Farms and Greenhouses
https://www.pubs.ext.vt.edu/SPES/spes-756.html
- University of Illinois Extension — Growing Microgreens
https://extension.illinois.edu/sites/default/files/growing_microgreens_1.pdf
- University of Illinois Extension — Options for Cleaning and Disinfecting Reusable Pots and Trays
https://extension.illinois.edu/blogs/commercial-fruit-and-vegetable-growers/2024-02-20-southeastern-illinois-olney-update-options
- LSU AgCenter — Microgreens: A Guide to Growing Microgreens for the Home Gardener
https://www.lsuagcenter.com/articles/page1625257098667
Peer-Reviewed Background Research
- Phenolic Constitution, Phytochemical and Macronutrient Content in Three Species of Microgreens as Modulated by Natural Fiber and Synthetic Substrates
https://pmc.ncbi.nlm.nih.gov/articles/PMC7139710/
- Organic Waste Compost and Spent Mushroom Compost as Potential Growing Media Components for the Sustainable Production of Microgreens
https://pmc.ncbi.nlm.nih.gov/articles/PMC10352662/
Company/Product Information — Not Scientific Evidence
- Andi’s Way — Growing Trays - 10x20 Flats With OR Without Drain Holes
https://andisway.com/products/growing-trays-with-drain-holes
Frequently asked questions
Related guides
How to Bottom-Water Microgreens Without Waterlogging the Tray
Learn how to bottom-water microgreens with nested trays, moisture checks, drain-off steps, and practical tips to avoid soggy media and standing water.
12 min read
Best Growing Medium for Microgreens: Soil vs Coco Coir vs Grow Mats
Compare potting mix, coco coir, and grow mats for microgreens. Learn the trade-offs in watering, cleanup, crop support, reuse, tray setup, and food safety.
16 min read
Do Microgreens Regrow After Cutting?
Most microgreens are a one-time harvest. Learn why some shoots may regrow after cutting, how baby greens differ, and when reseeding is the better choice.
8 min read
Stay in the loop
New guides, when they publish
An occasional email when a new guide goes live. No spam.
Your email is stored privately for future guide updates. No emails are being sent yet. Privacy policy